
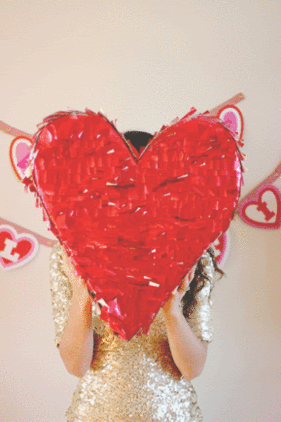
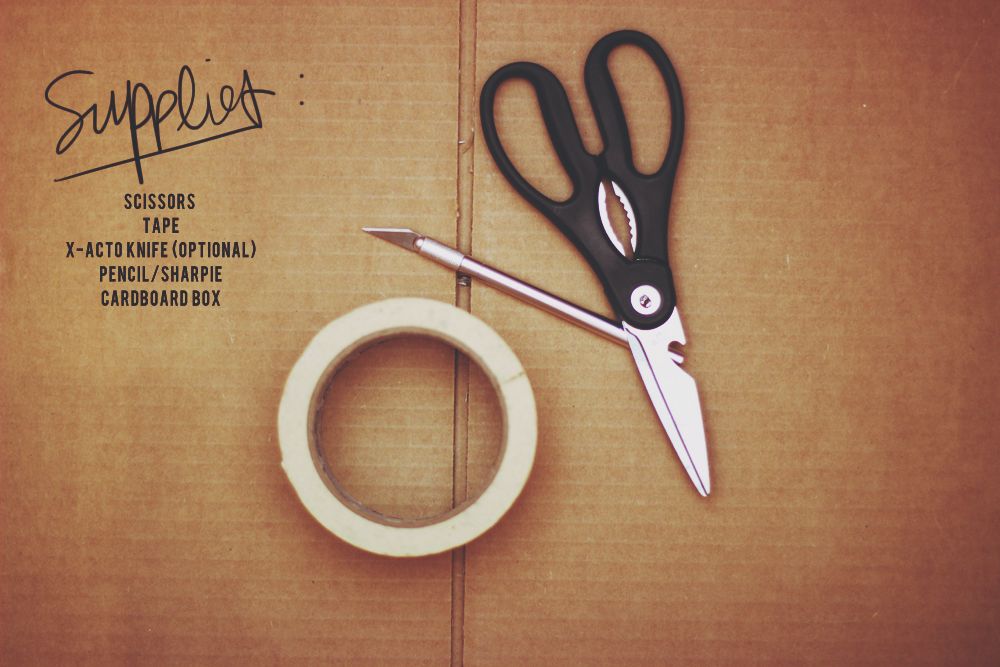
What's up, love birds. It's Kaylyn from The Weir House blog bringing you a tutorial on how to make a festive heart pinata just in time for Valentine's Day. How you choose to use it - smashing it with a bat, stuffing it with candy hearts or hanging it over your dinner table for a Valentines party - is totally up to you. The good thing about this DIY is that it doesn't take much to get it started. The only thing you need to get is metallic foil, patience and a tall glass of wine (it's required).
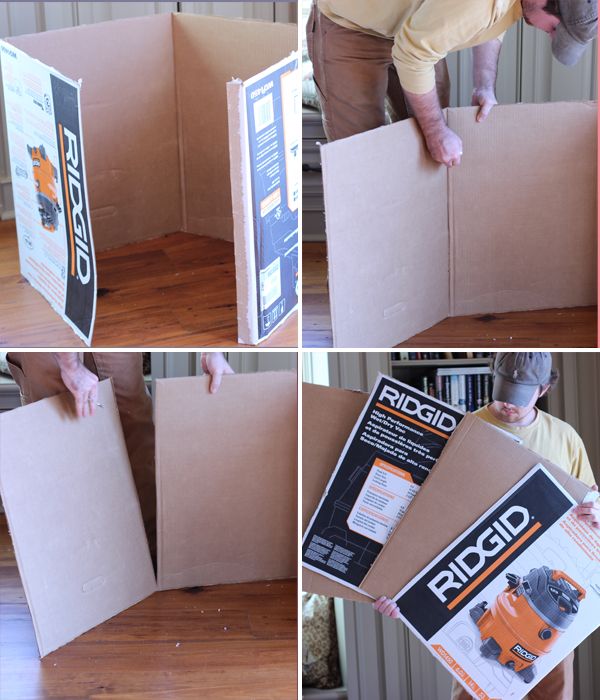
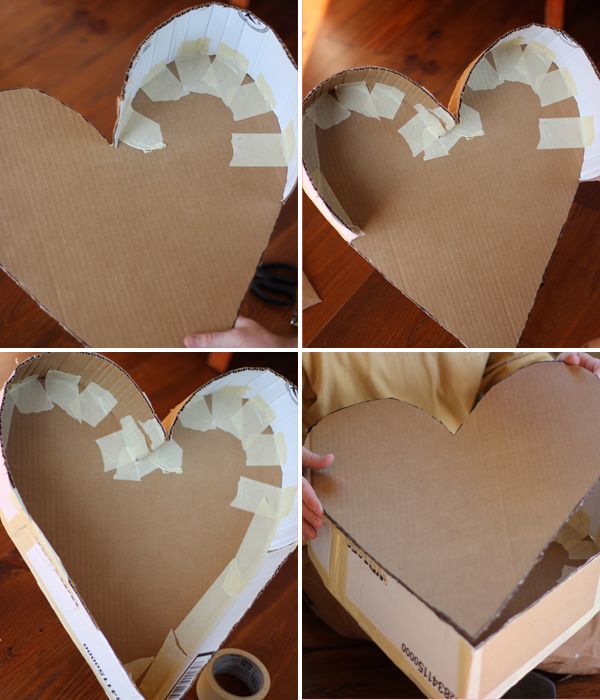
1. Using any cardboard box around the house, remove the flaps on the top and bottom of the box. KEEP THESE! You will use them later.
2. Cut the box open
3. Now cut the walls into individual sections.
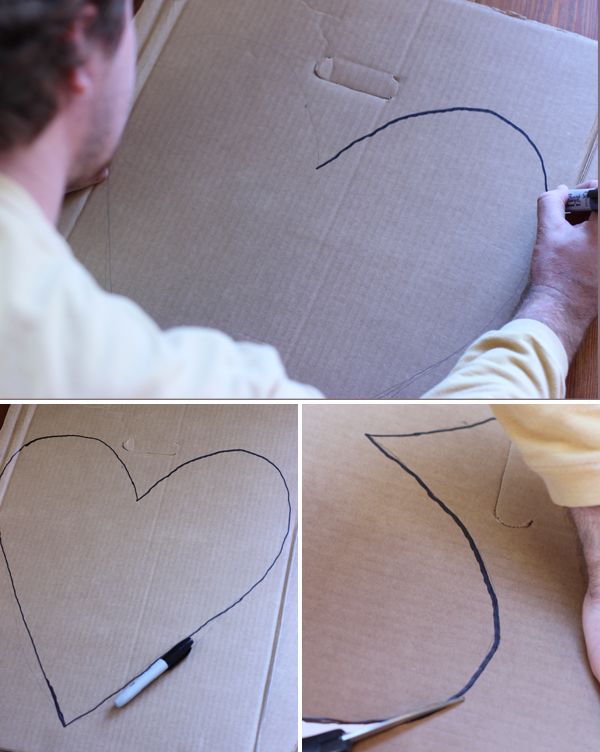
5. Using the heart you just cut, trace it on another section of cardboard. After it has been traced, cut it out. You should now have 2 hearts. These will be the front and back of your heart pinata.
7. Roll your flap so that it will become more flexible. These flaps will become the walls of your pinata.

8. Form the walls of the pinata by curving the flaps around the edge of the heart (you can't mess this up). Tape the flaps to the heart by using masking tape. This doesn't have to be pretty! You can tape it anywhere you want to hold it in place. It will be covered by foil later.
9. Once you have taped all of the flaps around the perimeter of the heart, grab your second cut out heart.
11. With the foil that you have (we ordered ours from dickblick.com) cut strips of it and fringe the strips.
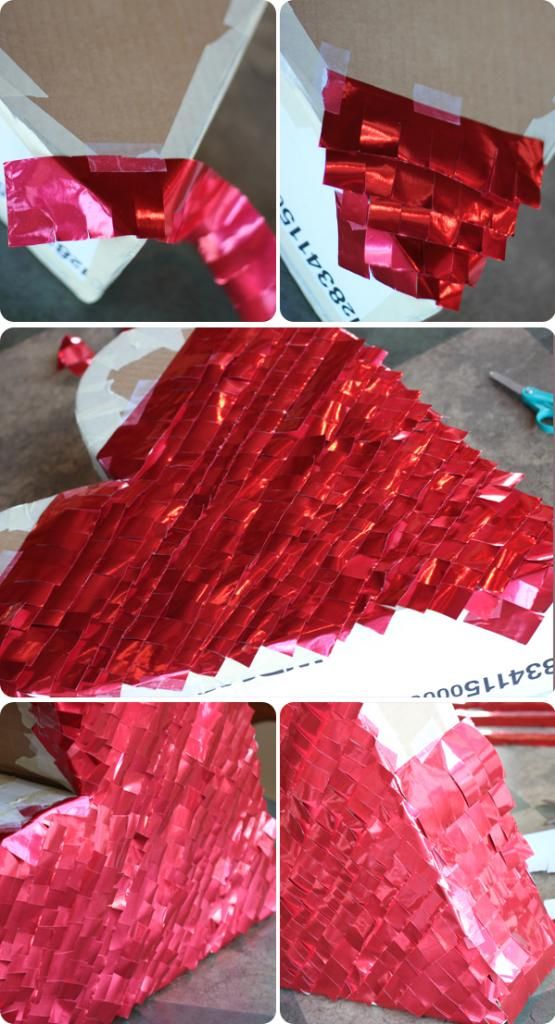
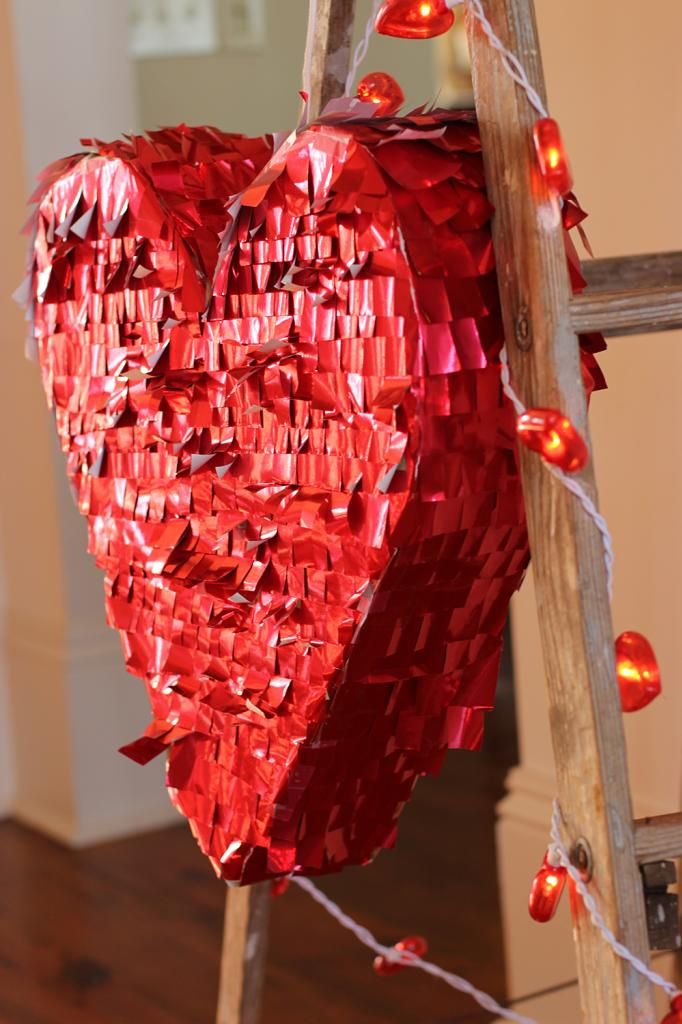
12. Start from the bottom of the heart and foil UP. This hides the tape. Finish the sides the same way. THE KEY: FOIL UPWARDS! There you have it, you've officially been shot with Cupid's arrow. Enjoy your glimmery heart and feel free to send us pics of your finished product!

10 comments:
I love this post! Kaylyn is so cute and so is that piñata!!
I love Kaylyn's blog! This tutorial is awesome, and perfect timing for me...my bff is getting married and wants a pinata at her bridal shower (ha!) I will def give this a while!
it looks amazing!
this is SUCH a cute idea!! Love this tutorial and Kaylyn's blog :)
this is so much fun! Who says pinatas are only for kids? Love it!
This is perfect for a Valentines party! Definitely checking out her blog!
It looks perfect! :)
This is such a cute idea!!
Kristina
Kristina does the Internets
ah, i love this diy! it is such a creative and cute idea for this holiday. possibly making this?!
lindsey louise
hellomrrabbit.blogspot.com
Eek! I love it! I want it!!! Soooo cute:)
Post a Comment